Paul's Electric Tempeh Maker
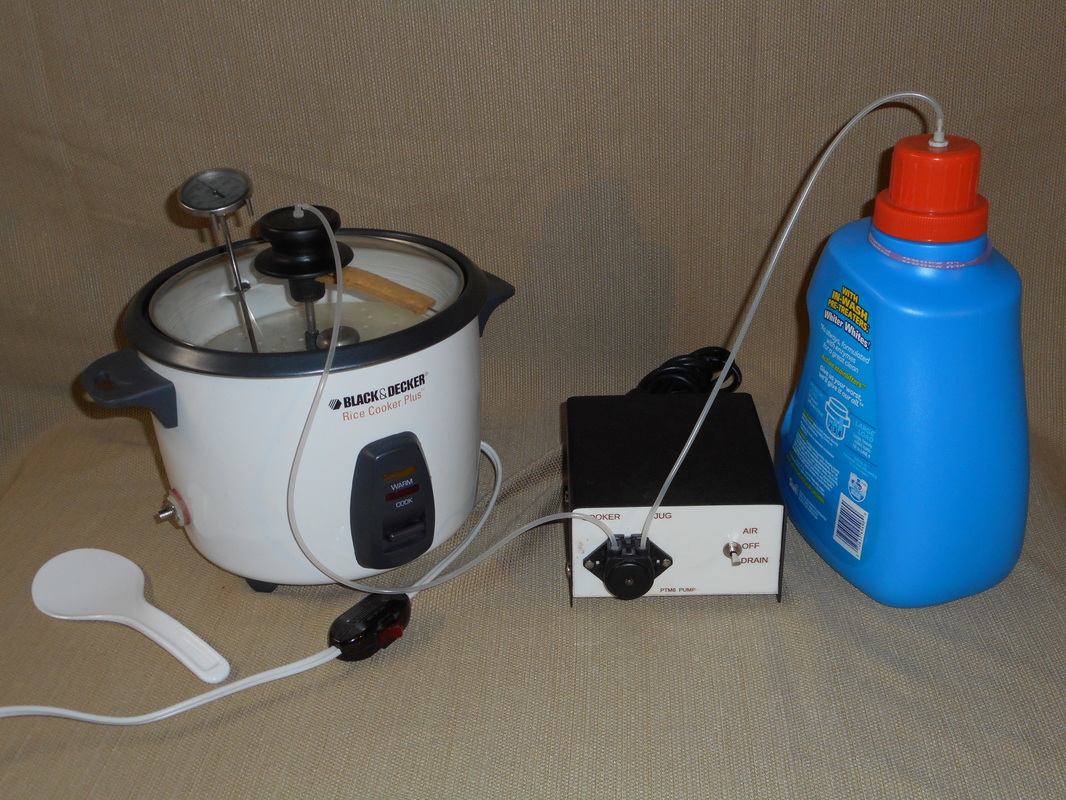
Tempeh Maker Setup
Introduction:
Tempeh making process is long (3 days) and somewhat labor intensive procedure. While I can't make it go faster, I can get most of the work done electrically. It will produce a 16 oz. batch of tempeh,without using plastic bags. I tried to combine as many operations as possible. My Electric Tempeh Maker is built from a modified Black & Decker 16 Cup Rice Cooker/Steamer, and a controller box containing a peristaltic pump, a reversing switch, a 12 volt power supply and a plastic storage container. The “WARM” temperature in the Rice Cooker chamber is set by an adjustable thermostat. The temperature is set to 88' F (31' C), using an accurate thermometer. The drained soak water is stored in a 64 oz. Laundry Detergent Jug. Water is filled and drained from the pot and air is injected into the pot, by a low volume peristaltic pump. The slight air flow provides the necessary oxygen for fermentation and also keep the chamber at a slight positive pressure. This will minimize entry of wild mold spores and bacteria that may be lurking in your home. The inside the cap of the storage container has a foam filter and a 50 ml plastic tube with a 1/4 inch dip tube attached to it. This allows a small amount of water to be injected back into the pot to raise the humidity level during incubation. The Rice Cooker/Steamer still can be used for its original purpose.
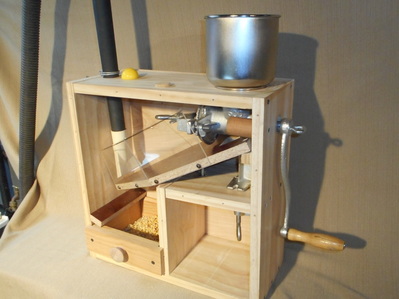
Mill the Beans:
You can purchase Hulled/Split Soybeans over the internet, or you can make make your own. I use a Chrona type grain mill to crack the soybeans. Originally I would take the mill out of the box, set it up on a table mill the beans,put it back into the box and winnow the cracked beans in front of a fan. So I put the mill and winnow in a box. I use a shop vac to suck away the seed coats. Now, I just take the box off the shelf and do it all in one shot. The mill spacing is adjusted so that so each bean is cracked into 2 to 4 pieces. I mill 1-1/4 cup of dry soybeans. The slope of the slide is set to collect most of the seed coats but few of the beans. I liked to add a 1/4 cup of brown rice to the beans. If you don't have a grain mill, there is a squishy wet method for cracking the beans. It's messy!
Soak Beans 10-24 hrs:
Add 1/4 cup of white vinegar to the 64 oz. Jug. Fill the Jug to the top with water. Pour the water/vinegar into the cooker pot. Place the fine mesh plastic disk into the dry steamer basket . Transfer the beans&rice mixture into the steamer basket Use the perforated ¼ acrylic disk to level and tamp down the mixture. Just press out any air pockets and level the mix. Leave the acrylic tamper in place. Slowly insert the steamer basket into the filled cooker bowl. Carefully thread the dip tube through the plastic fitting into the center holes in the basket. Allow 10 to 24 hrs. soak time. You can skim off any stray seed coats that float up.Adjust the soak time to fit your sleep/work schedule.
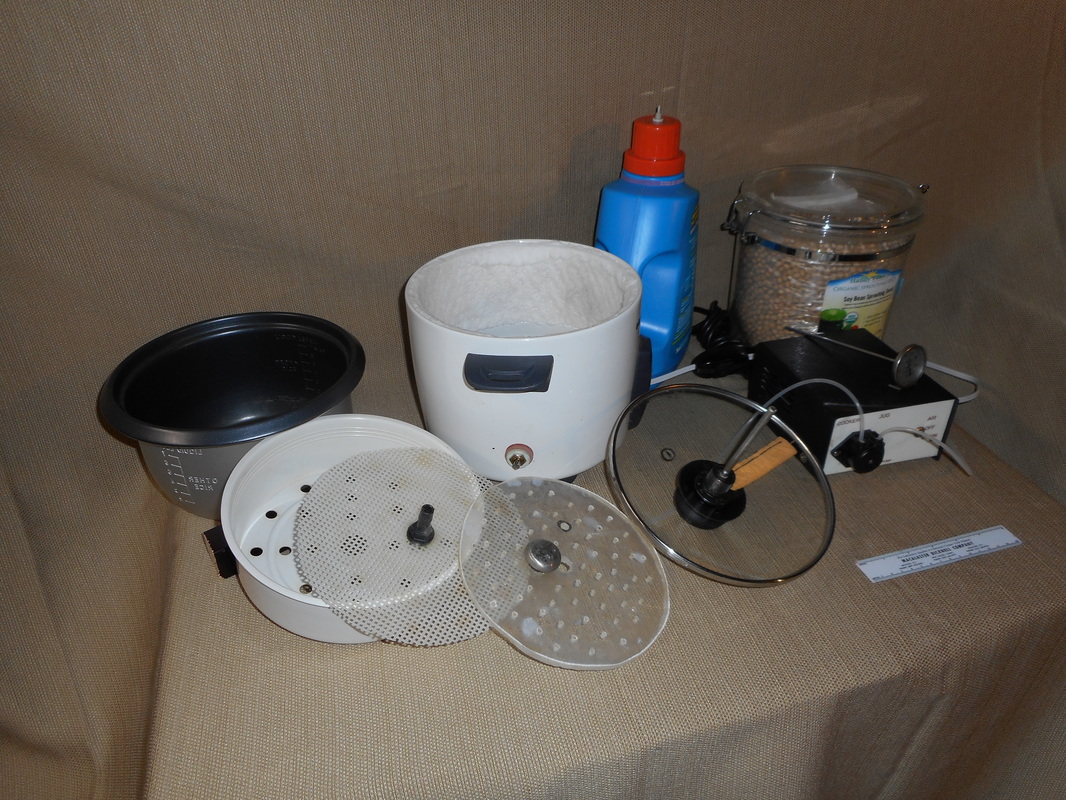
Tempeh Maker Components
Drain the Beans:
Connect the tubing from the top of the cooker to the “cooker” port of the pump. Connect the “drain” side of the pump to the top of the storage jug. Set the Pump Controller Switch to DRAIN. Allow 40 min to draw down the water in the pot. Turn off the pump. 1-1/3 cups of water will be left in the pot to provide steam for cooking.
Cook the Beans and Cool:
Plug in the cooker and flip the cooker switch to “COOK”. The beans will steam cook for 40 min, The cooker will automatically trip the switch to the ” WARM” when the water boils off. Allow 5-6 hrs for the beans to cool down in the cooker. You can accelerate cooling by transferring the hot mix to a metal mixing bowl. Cover the bowl with a towel. You never know whats floating around.
Plug in the cooker and flip the cooker switch to “COOK”. The beans will steam cook for 40 min, The cooker will automatically trip the switch to the ” WARM” when the water boils off. Allow 5-6 hrs for the beans to cool down in the cooker. You can accelerate cooling by transferring the hot mix to a metal mixing bowl. Cover the bowl with a towel. You never know whats floating around.
Dry the Beans:
When the temperature of the beans gets below 95 degrees F . Turn on the AIR. Stir to dry the surface of the beans. If your in a hurry you can use a hair dryer. Don't cheat, this is a critical step. The surface of the beans must be dry. Dry the beans until they have a dull matte finish. You can be sure by dusting the beans with rice flour. This will absorb any remaining water on the the bean surfaces.
When the temperature of the beans gets below 95 degrees F . Turn on the AIR. Stir to dry the surface of the beans. If your in a hurry you can use a hair dryer. Don't cheat, this is a critical step. The surface of the beans must be dry. Dry the beans until they have a dull matte finish. You can be sure by dusting the beans with rice flour. This will absorb any remaining water on the the bean surfaces.
Inoculate:
When the beans are cooled, sprinkle the Tempeh Starter onto the mixture of dried beans/rice. Mix thoroughly. Then mix again. Replace the Plexiglas weight. Use the weight to tamp down and level the beans/rice. Replace the cover and dip tube. Switch the pump controller to “AIR”. The pump will return 50 ml of water to the cooker pot. This will rase the humidity in the cooker. Then a small volume air will be pumped into the pot, to provide oxygen the the fermenting beans.
Incubate:
Incubate at 88 degrees F (31 C). If the temperature of the beans/rice surface goes above 95 degrees, you can turn off the power to the cooker. The fermentation will produce it own heat. Rotate the top knob to wipe the condensation off the bottom of the glass cover. Start checking the tempeh at 24 hrs. When you see gray spores forming around the vent holes in the Plexiglas weight your tempeh is done. Cool and refrigerate for up to a weak, or freeze.
Incubate at 88 degrees F (31 C). If the temperature of the beans/rice surface goes above 95 degrees, you can turn off the power to the cooker. The fermentation will produce it own heat. Rotate the top knob to wipe the condensation off the bottom of the glass cover. Start checking the tempeh at 24 hrs. When you see gray spores forming around the vent holes in the Plexiglas weight your tempeh is done. Cool and refrigerate for up to a weak, or freeze.
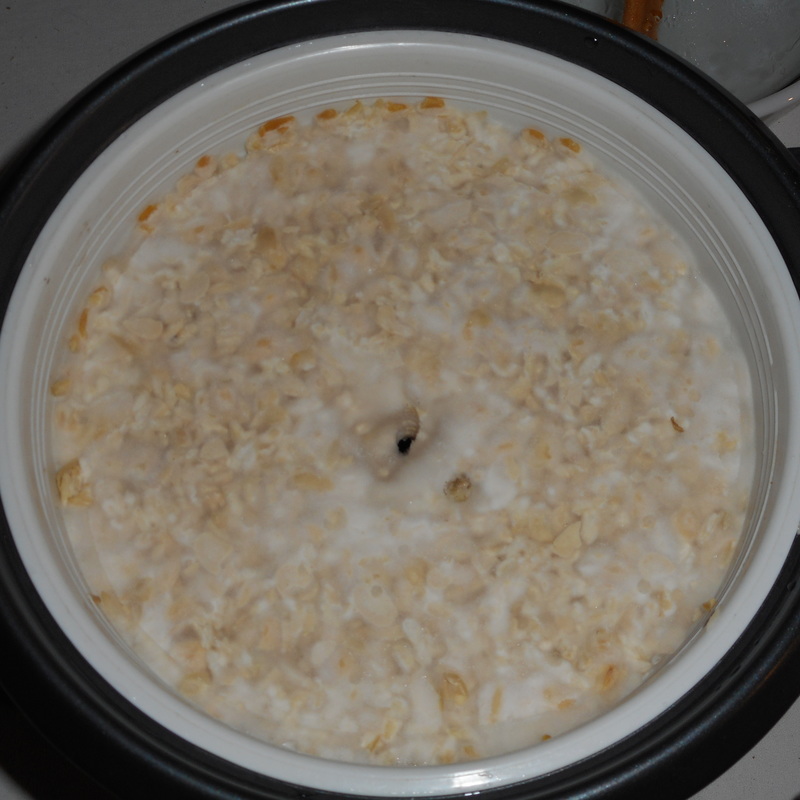
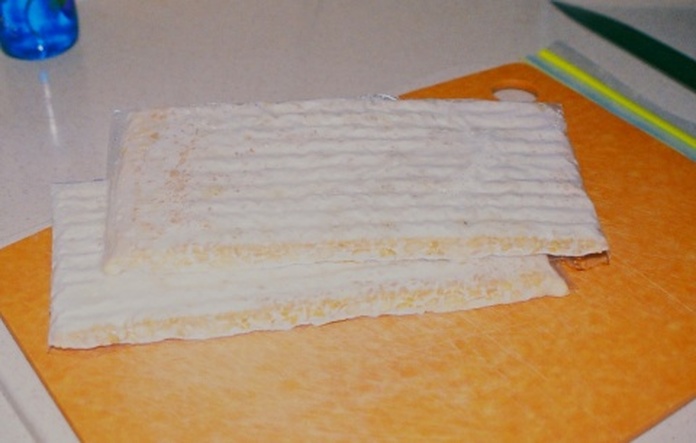
Finished Tempeh
Construction:
Material:
Black & Decker 16 cup rice cooker steamer, walmart_______$20
Ceramic foam insulation, 1/2", ceramicmaterials.com________$9
Egg incubator thermostat, Incubator Warehouse___________$17
Shaft Lock 1/4",Allide Electronics______________________$2
Knob,skirted, 36mm, 1/4" shaft, jameco.com_______________$1
Spring Wire, 0.063" SS______________________________$15
Drying Chamois, 0.2" , amazon.com_____________________$13
Stainless Steel tubing, .152" I.D. x 1/4" O.D., grainger.com_______$19
Plastic Screen, Darice 14count, amazon.com________________$6
Barb bulkhead 3/8" hose, PHBBF-3/8, jehmco.com___________$2
1/16" Hose barb x 10-32 male, nylon, amazon.com____________$4
1/4" clear acrylic sheet, 8"x8", professionalplastics.com_________$4
Centrifuge Tube 50 ml w screw top, amazon.com____________$12
12v DC Dosing Pump peristaltic, banggood.com______________$11
Silicon Rubber Tubing 1/16 x 1/8" #3038K11,mcmaster-carr_______$6
Case, metal,7.3x6.3x1.5",amazon.com_____________________$10
Strain Relief Bush SJ/SJT nylon, jameco.com_________________$1
AC Receptacle, snap in, jameco.com______________________$1
Switch, toggle DPDT,on-off-on, jameco.com_________________$2
12 v power supply, 2A switching,_________________________$10
Grain Mill, walmart.com_______________________________$29
Storage Jug, Purex, 64 oz_________________________________$0
1/23/17pepin
Lights Out Tempeh Maker
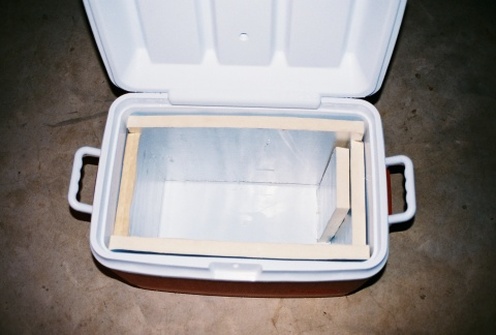
Tempeh is a highly nutritious fermented soybean food from Indonesia. It has a somewhat nutty flavor and a firm texture. To make tempeh at home all you need are beans, some tempeh starter culture, and a warm environment. If you live in Indonesia the warm envirment is not a problem, but in my house, it is. You can make tempeh at home without a temperature controlled Incubator, or even electricity, if you can heat water. You can use a 48 Qt. Insulated Picnic Cooler and a flat top Six Pack cooler. I used Coolers from Rubbermaid (Victory 48-Quart Cooler 3-Piece Value Pack---$40). I made the 48 Qt Cooler Super Insulated by inserting 1" foil faced insulating foam board around the inside of the sides of the Cooler. You will also need a calibrated thermometer.
Tempeh is a highly nutritious fermented soybean food from Indonesia. It has a somewhat nutty flavor and a firm texture. To make tempeh at home all you need are beans, some tempeh starter culture, and a warm environment. If you live in Indonesia the warm envirment is not a problem, but in my house, it is. You can make tempeh at home without a temperature controlled Incubator, or even electricity, if you can heat water. You can use a 48 Qt. Insulated Picnic Cooler and a flat top Six Pack cooler. I used Coolers from Rubbermaid (Victory 48-Quart Cooler 3-Piece Value Pack---$40). I made the 48 Qt Cooler Super Insulated by inserting 1" foil faced insulating foam board around the inside of the sides of the Cooler. You will also need a calibrated thermometer.
|
|
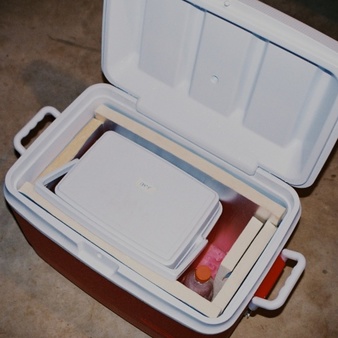
Fill the Insulated Six Pack Cooler filled with 7 1/2 quarts of 134'F (57'C) water. The hot water will bring the temperature of the 48 Qt. Cooler up to 91' F (33'C), from room temperature, in about 2 hrs. The Hot Six Pack Cooler will slowly release its heat into the Big Cooler over a period of hours. Because of the super insulation, the temperature will only slowly decay for 10 to 15 hrs. Then the growing mold in the tempeh will begin producing its own heat. The Cooler temperature should max out at 91'F (33'C). The fermenting tempeh will hold the beans at 89-90' F (31-32'C) for 36 to 48 hrs. You will need to experiment with the starting water temperature to get the temperature range of the 48 Qt Cooler correct. Do not exceed 91'F (33'C) for the initial temperature. After 30 hrs, start checking the tempeh every couple of hours. Open the cover,quickley check the tempeh, and close the cover. Don't leave the cover open to long, the box will cool quickly. The beans should be covered with white mycelium. When you see dark gray mold spores around the vent hole, the bag of tempeh is mature and ready for harvest.
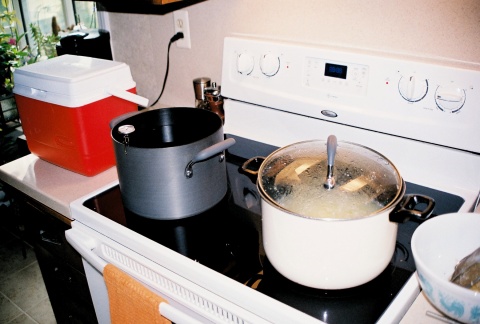
- Measure 2 cups of dry soybeans into a large pot. Cover with water and boil for 30 min. Remove the pot from the heat and allow to cool for 2 hrs.
- Strain out the water. Use your clean hands to squeeze the beans through your fingers. Don't be gentile, you need to split the beans in half and loosen the seed coat. A potato masher will also do a good job. Flow cold water into the pot of split beans. Create a whirlpool of water. The seed hulls will tend to float in the moving water. I used a hose clamped along the edge of the pot to create a vortex. Use a strainer to skim the hulls out of the water. Give the beans another squish with the potato masher and repeat skimming. Repeat the process until you get most of the hulls skimmed off. It doesn't have to be perfect.
- Cover the beans with water in pot. Add 2 Tbs of White Vinegar. This insures an acid environment to make the tempeh spores happy. Boil the de-hulled beans for 30 min. Skim off any hulls that pop up. Strain the beans and return them to the hot pot. Stir constantly until the beans are dry. The surface of the beans should look dull. Remove the beans to a dry towel and give them a good rubdown. This is a critical step, if the beans are to wet the tempeh starter will not take and the batch will fail. Transfer the beans to a large mixing bowl. Use the thermometer to measure the temperature of the beans. Wait until the bean temperature is below 85'F (29'C). Don't rush, high temperature will kill the mold.
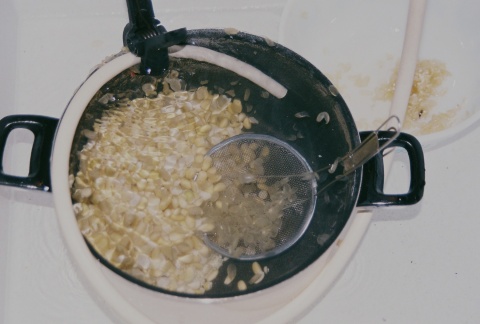
Skim Off the Seadcoats
|
Cooking Beans
|
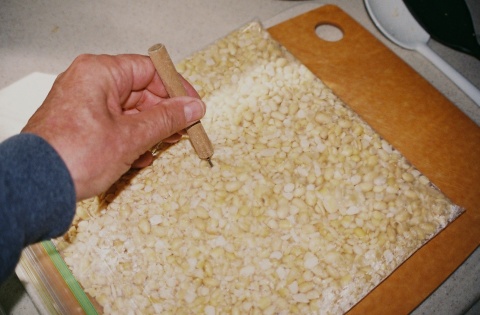
4. When the beans are cooled to 85' F, sprinkle 3/4 t of tempeh starter evenly onto the beans. Mix the starter into the beans thoroughly Spoon the beans into a 1 Gallon ZipLoc plastic bag. Spread the beans out evenly on a flat surface. Be sure to push them into the corners.
5. Use an large needle (or small nail) to vent both sides of the bag. Punch holes every 1/2 inch. You need to allow air into the tempeh.
6. Fill the Six Pack Cooler with 134'F (57'C) water. Close the cover and place it in the bottom of the 48 QT Cooler. The hot water will bring the temperature of the big cooler up to 91' F (33'C) in 2 hrs. or so.
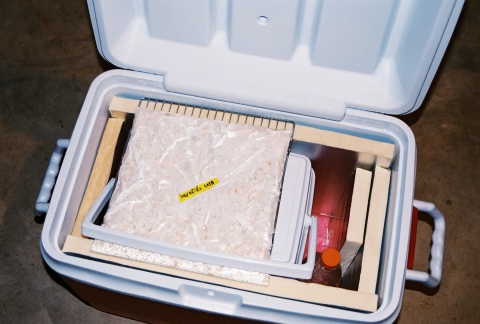
7. Set the cooling rack on top of the Six Pack Cooler in the 48 QT Insulated Cooler. Place something, like cardoard on top of the Sixpack Cooler to prevent direct contact with the Ziploc bag. Place the bag of beans on the cooling rack, close the cover and go away. Don't cheat and look in on the beans, you will mess up the temperature. Come back in 30 hrs and start checking your tempeh.